By Guest Writer Kirsti Johanson
Welcome to our third and final installment of Watercolor Journaling – Getting Started! You can read the previous installments here: PART ONE and PART TWO. You’ve gathered your supplies, you’re ready to play, but … you don’t know where to start.
Good news! The best place to start is the beginning.
One of my great joys when I get a new set of paints is to swatch them and see what the paints will do. There are lots of ways to do this, but in general I like to just pull out a page of watercolor paper and make a space for each color and a spot to take some notes – then I like to make another space for the color with extra water. Sometimes I take notes on what I’ve actually done with the mixing, but the nice thing here is that the colors don’t always look the same in the pan as they do on the paper.
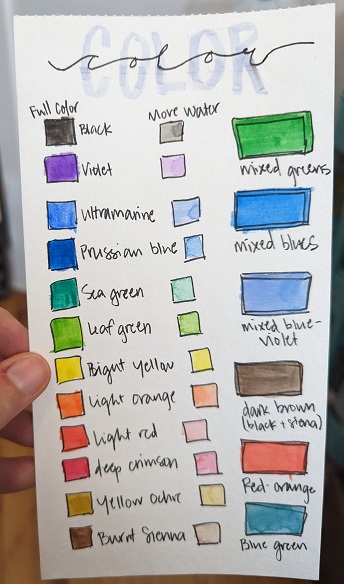
Swatching isn’t required, because there are no rules in playing with watercolors. But it is fun, and it’s a nice reference for when you’re ready to get started.
Techniques and Tricks
Now that you’ve tried the colors, you’ve used a technique called Wet on Dry (wet paint on dry paper). Try another piece of paper and this time, use your brush and some plain water to make the shapes on the paper, and then paint on that wet paper. This is a technique called Wet on Wet and works well for blending and playing with color pigments mixing in the water.
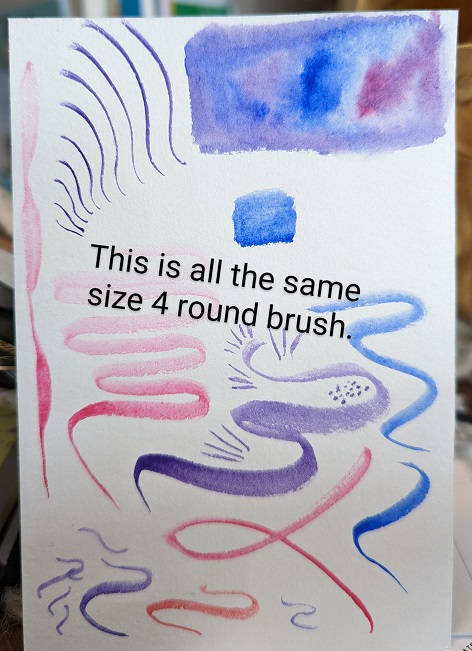
Get to know your paint brushes. Different shapes and sizes will do different things with water and with paper. I tend to prefer a round brush and like to use sizes 2 and 4 as well as a fine liner size 0.
Don’t worry about painting any specific thing, but just try some brush strokes. More pressure puts the belly of the brush (widest point of the round bristles) on the paper and gives a heavier line. Light pressure means that only the tip of your round brush is on the paper, and you’ll get a finer line.
Layering works best.
Watercolor, unlike other kinds of paint, works best when layered to build up the more nuanced coloration. Always start with the lightest color as the undercolors, and build on top of that with your more saturated colors. If you don’t let the layer dry before adding a new layer, colors will get muddy. But…sometimes blending the color on the paper makes for a gorgeous variation. Try layering wet on wet as well as wet on dry. Look at how the color changes as you add colors to your painting.
Let’s give a sketch a try!
Now that you’ve tried a few things and you have swatched your colors, it’s time to give a sketch a try. Because I don’t ever aspire to re-create the picture in front of me, sometimes I just let the view get a little out of focus so all I’m seeing are shapes and colors. Try to relax enough that this is what you get from your view. Using a pencil, add a few shapes to your paper. Remember, there is no need to be perfect – it’s about playing. Grab your paints and start to add a few colors – this is just the first wash, so it’s going to be kind of sloppy with light colors. Let it dry, and add another layer to deepen the colors. Keep building up those color layers until you feel like the painting has the feeling you’re capturing.
Adding detail.
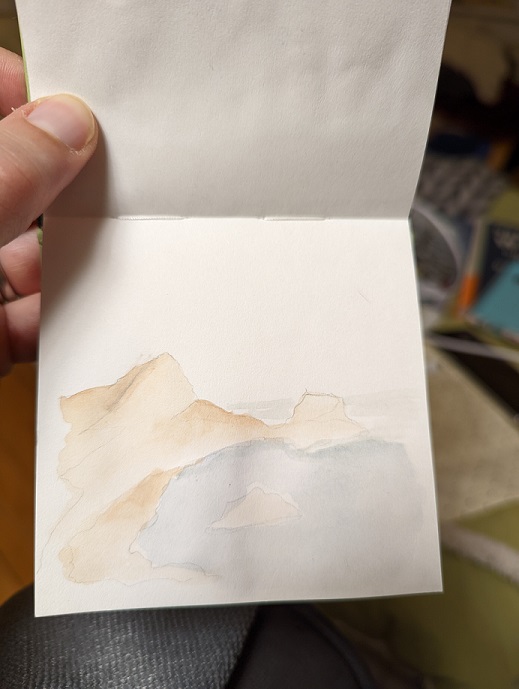
Once you have your color mood and some shapes on the page, add some detail if you’d like. Bring in a fine line marker or a small paint brush with a darker color to add a frame of branches, or choose to add a few highlights with a colored pencil. In general, my paintings look like pretty undefined blobs at the beginning [photo 11] and the colors added start to look a little more like the feel I’m trying to capture [photo 12]. It’s only after I’ve built up the color and added my shading that things start to look like the moment or feeling I’m trying to capture [photo 13].


The most important thing to remember is to leave your inner critic at home. She’s not welcome to comment on our fun!
Join me at the Girl Camper Wisconsin Spring Has Sprung-2 Event in May 2023 for a painting session and informal class if you’d like a little help getting started!
Connect with our chapter!
Theresa “Resa” Leppert
Guide Manager
Guide, Iowa & Wisconsin
563.284.2868
Girl Camper Magazine: Subscribe to Girl Camper Magazine here! Girl Camper Magazine
Events: Check out upcoming Girl Camper Events – you can attend events in any chapter! https://girlcamper.com/events/
Main GC Facebook Group – Join over 350,000 like-minded women in our public Facebook group! Girl Camper FB Group
Facebook Page – This is my public Iowa & Wisconsin page, where I’ll share Girl Camper news, events and more. Girl Camper – Iowa & Wisconsin
Private FB Group – Where you can interact with others who are interested in camping in Iowa & Wisconsin! Girl Camper Iowa & Wisconsin Group.
Resa’s Articles – Click this link to see all of Resa’s articles on the website! ARTICLES
Resaarticle